Monday, October 27, 2014

Cold-Smoked Salmon


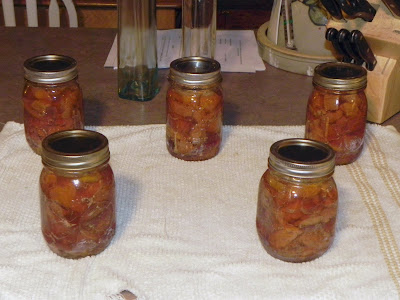
My son has been fortunate enough to go salmon fishing in New York several times over the past few years.  He goes with his friend and his friend's father and I am totally jealous!  I am not a big fan of cooked salmon, unless it is grilled, but I don't make a special effort to cook and eat it.  However, something that is a very special treat is cold-smoked salmon.  Now THAT is something I make a special effort to prepare and eat! 

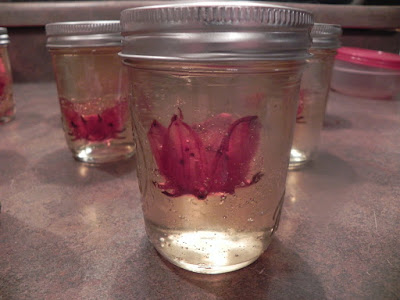
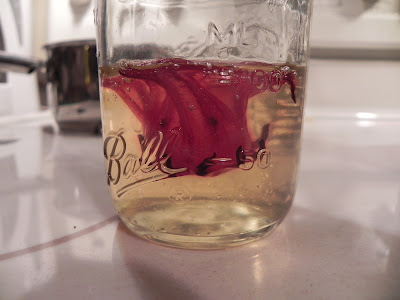
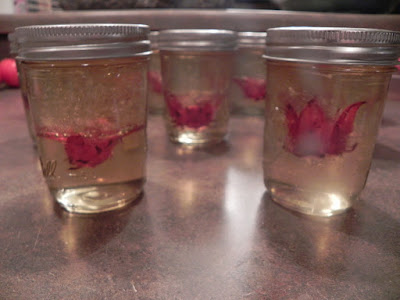
Here I am vacuum-packing the fish, and setting 3 of the fillets aside for cold-smoking.


An important note regarding food safety in preparing cold-smoked salmon.  Cold-smoking does not cook the fish, it only adds flavor.  There are a number of parasites that can be found in just about any fish, and just like any fish you also have to use safe food handling with salmon.  Other than the freezing step, during this whole process you want to keep the salmon between 33 and 40 degrees Fahrenheit to inhibit bacteria growth.  If you freeze it, then keep it cold throughout the process, the salmon will be very safe to eat.

The process, in a nutshell
I tend to get wordy, so instead let's look at the steps in this process
1. Freeze the fish
2. Cure it
3. Desalinate
4. Cold-smoke

Freeze the fish
The way that any possible parasites are killed is by freezing the salmon at -10 degrees Fahrenheit (-23 C) for at least 5 days.
First, wrap the salmon and freeze it at -10 degrees F for at least 5 days.  Then thaw it in the refrigerator, and NOT at room temperature.  After it is thawed, pat it dry with a towel or paper towels and place the fish in a casserole dish.

Cure the fish:
2 average-sized salmon fillets will weigh about 1 1/2 pounds, and these are the amounts that I use for that much salmon.  However, this time I made 3 fillets which weighed about 2 1/4 pounds, so I had to increase these amounts accordingly.  Instacure #1 that is mentioned is curing salt that contains 6.25% Sodium Nitrite and is also known as Pink Salt, or Prague Powder, and is used to cure the meat and inhibit microbial growth.

1 teaspoon Instacure #1 curing salt
1/2 cup kosher or canning salt
1 Tablespoon white pepper
1/2 cup white sugar, or brown sugar

This can be increased or decreased depending on how much fish you are preparing.

Mix the ingredients well, the curing salt needs to be well distributed.  Place a thin layer in the bottom of the casserole dish, then lay the fish on top of that.  Distribute the rest of the cure over the top of the fish, and try to cover the fish entirely.


Cover and allow this to sit in the refrigerator for 24 hours, then rinse all of the salt off the fish.

Desalinate the fish
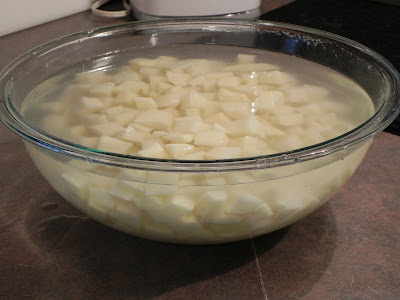
In this next step you will be removing the excess salt.  Place the rinsed fish pieces back in the casserole dish, and fill with cold water.  Place the fish in this water for about 30 minutes in the refrigerator.  Rinse the fish in cold water again then pour the water out and fill the dish with water again.
Place the fish back in the water-filled dish.  I used to desalinate the fish for an hour only, but I found that the final product was way too salty.  After experimenting some, I found that allowing the fish to sit in fresh water overnight in the refrigerator lowers the salinity of the fish much better.
After it sits overnight in the water, pour out the water, and rinse the fish under cold water again.  Then dry it well with paper towels or a towel. 
Place the fish in the casserole dish UN-covered and in the fridge for 24 hours.  This will dry the fish some and form a thin skin that will help in the smoking process.

Here I have drained the fish, dried it with paper towels, then placed it on top of paper towels in the dish, then placed in refrigerator


Cold-Smoking

Cold-smoking is not a cooking process.  The idea is to apply smoke to the food, but not cook it.  You don't want the temperature in the smoker to get above about 80 degrees.  However, I make sure that it stays MUCH lower than that, preferring to get into the safe meat temperature zone of 33 to 40 degrees.  The last batch I smoked was done when the outside temperature was close to 45 degrees.  I also placed a large bowl of ice above and below the fish in the smoker.  A thermometer placed in the smoker showed that it never got above 40 degrees.
The way that I cold-smoke is to use an attachment that I bought for my smoker, a Smoke Daddy smoke generator, available HERE.  This attaches to my smoker as shown here:


The smoker is just used as a chamber to hold the food and smoke, it is not turned on during this process.  The smoke generator gives a lot of smoke but with very little heat.  It is especially ideal for smoking cheese.The smoking time in a lot of articles on the internet are 12 to 24 hours.  I have found that you get a good smoke flavor after an hour or two, I generally smoke it for 2 hours.
If it is not cool enough outside, try to smoke when the sun is low or at night.  Also add a large bowl of ice above and below the fish.  You want to keep the fish cool, even the sun shining on it can heat it to 90-100 or so, and that is too hot and will cook the fish.

I didn't want to waste all the other space in the smoker, so I added some cheese; Gouda, a hot pepper cheese, and a cheese from New Zealand that my wife had bought.


After smoking it for a couple of hours or so I refrigerate some and freeze the rest,  depending on how much I have prepared. 


Serve it alone, or on a bagel with a 'schmear' (cream cheese) or with crackers and cream cheese, or any way you would like.


Sunday, October 12, 2014

How To Make Horseradish

I moved into my current home 18 years ago in 1996 and there was already a small horseradish plot in the back yard near the garden area.  It comes back every year, and I have to control it to keep it contained in its area, which is about 8 by 3 feet.  If you are thinking about planting horseradish roots, think ahead and plan an area that will be horseradish until doomsday.

Making prepared horseradish isn't rocket science, just take one simple precaution.  When you grind it, do it outside, on the porch for example.  If you have to do it inside, open some windows and run a fan.  The first year that I made it my son was 5 years old and he looked at me while I was grinding it and said "Dad, your face is all red!"  I looked in the mirror and my face was beet red from the fumes.


Digging

Move the leaves aside, or cut them off at ground level.  Compost them, mulch them, burn them, whatever.  I can't think of another use for them, especially since my chickens won't even eat them, and my chickens will  eat just about anything.  For example, they LOVE chicken!


Start your shovel about 8 to 12 inches from the base of the plant and go as deep as you can go.  Then work your way around the plant and dig a circle around the entire plant.  Before lifting it up out of the ground with your shovel, try to remove as much of the dirt as possible so that you can see where the roots are and how long they are.  I have dug a foot deep and still missed a lot of the root!


Lift it out of the ground, it usually takes quite a bit of leverage from the shovel to lift it out.  You will probably miss some of the root, especially with hard soil like mine, but don't worry, there should be plenty of it anyway.  Here is a section of root after it was pulled out of the ground.


Next you want to remove the excess soil from the root.  I guess you could do this in your sink, but I know my wife would have me sleeping in the shed for a while if I did that.  I enjoy a warm bed inside at night so I rinse it off outside with a hose, on the jet setting if you have a head that is adjustable.


It should look like this when the soil is removed.


Peeling
If the roots are nice and straight, they are much easier to peel.  But large, gnarly pieces as seen above can be broken up into pieces like this that can be more easily worked with a potato peeler.


Scrape the root with a potato peeler until all of the brown outer layer is removed.  It should look about like this after it is peeled.  In this picture you can see a couple of brown spots that I had to cut out with a knife.


Grinding

Next chop it with a good, strong knife into about 1" chunks or smaller.  Try to keep them approximately the same size, this will help to keep the grinding consistent.


Use a blender or food processor, however I highly recommend that you use one with a NON-plastic bowl.  You are basically grinding wood and a plastic food processor or blender will get terribly fogged from scratches.  I learned this the hard way the first year that I made it.
This is approximate, but for every cup of horseradish root, add about 3/4 cup of white vinegar, a teaspoon of salt, and totally optional would be to add 2 teaspoons of sugar.
Grind about 2 cups at a time, adding slowly to get to that point.  Grind it WITH the vinegar added, otherwise it will not grind well, if at all.  You will get a feel for how much vinegar to add as it starts to grind.  Just look for the consistency of store-bought horseradish.  Adding vinegar helps it to grind in the blender, but you don't want to add too much and end up with horseradish soup.
I grind it a lot, probably 3-4 minutes or longer for every 2 of cups of horseradish.


At this point you are basically done, but now to package it.  Horseradish is NOT to be canned, rather it should be frozen, except for a jar that you want to keep in the refrigerator for fresh eating.  The easiest way, and the way I normally do it, is to place it in freezer containers.  I would recommend using half-pint containers unless you eat a lot of horseradish, then you can place it in pints (or larger.)  I don't use large containers because horseradish starts to lose its pungency after a couple of months.   I keep one half-pint in the refrigerator and keep the rest frozen.
This next pic is something that is totally optional.  In fact, this is the first time I have experimented with it.  Jars of food can easily break when frozen, so I am trying to suck the air out of the jars before I freeze them.  This is my FoodSaver V3880 vacuum sealer, which I love.  So far, the half-pint jars have not broken in the freezer, I may or may not be onto something here.  I will follow up with more info if I have any problems.


Here is the final product ready to be frozen, when I had some in half-pint jars and some in pint jars.  However, after this pic was taken I decided not to use any pint jars and split them into 2 half-pint jars each.


As you can see, it is a simple process but it is a lot of peeling and grinding.  If you like horseradish like me, you will LOVE making your own.

Sunday, April 22, 2012

Solar Canning Jar Lights


Here is a picture of this solar-powered canning jar light that I made last night. I can foresee many variations on this using blue jars, clear jars, with and without frosted glass, etc. Hopefully soon I can post some directions on how to make these.

Friday, March 30, 2012

White Grape Jelly With Hibiscus Flower


I am so happy with the way this turned out! I bought some edible hibiscus flowers that were canned in syrup online, and basically followed the directions for my layered jelly.

The difference was that both layers were made with white grape juice, but you could make one of the layers purple if you preferred. Also, when pouring the first layer, I added a hibiscus flower to the jar. The reason there are two layers is because the flowers float in the jelly and I didn't want the flower at the top. I'm now trying to figure out if there is a way to stick the flower to the bottom of the jar and then filling with jelly. So far, I can't think of any way.

I rinsed the flower well because it is packed in what looks like beet juice and I didn't want the jelly to get cloudy. After the first layer sets, just add the second layer and process/seal.

Here is what it looks like after the first layer is done.


This is actually fairly simple, it just takes two batches of jelly. However, your yield is twice normal so 'it all comes out in the wash.'


There are a LOT of possibilities with layering jelly and jams, I think I have just scratched the surface. I THINK this is a unique idea, because I am unable to find anyone else doing it on the web. Anyway, I am pretty happy with it!

Wednesday, March 14, 2012

Marty's Layered Purple & White Grape Jelly


There is a big women's event coming up at our church in April, the 10th Annual Ladies Gala.

They allow certain vendors to sell items, and I signed up to sell jellies and jams. I have been thinking of ideas for jellies and jams that are different, unique and/or have eye-appeal. This past week I came up with the idea for layered jelly. Just to see if there was actually someone else that had done it before, I surfed the net and found nothing. Someone somewhere has probably done this before, but I didn't see any web postings.

This ended up being fairly simple. Each of the layers have the same ingredients (except for the color of the grape juice.) Also, I worked with grape juice instead of grapes and that is a HUGE time saver.

I am going to make an assumption here that anyone trying to do this has at least SOME experience in jelly/jam making. It will save me the time of typing out each and every little instruction! My yield for this was 10 half-pint jars.

Ingredients for each layer:
3 cups of grape juice (4 cups for the white jelly and 4 cups for the purple jelly)
4 cups of sugar
1 packet of pectin powder
1/2 teaspoon of butter (optional, reduces foaming)
Also get a clean, sterilized cloth ready by boiling it in water, I will talk about why you do that later.

Add the 4 cups of juice of the color you want on the bottom of the jar, the pectin and butter to a large pot. You will get splattered with very hot drops of jelly if you use a small pot! Stirring constantly on high heat, bring the juice up to a very hard boil. Then add all of the sugar at once, keeping the heat on high, and constantly stirring.

Bring again to a FULL ROLLING BOIL, a boil that does not go away when stirred. Most jelly recipes will tell you to boil for exactly one minute at this point. I needed to insure that this jelly set right, and set firmly. You need to get it to the point where the jelly sheets, or at least drips a lot slower than normal from the spatula or spoon. So at the one-minute mark I started dripping juice from the spatula, until the drips slowed down quite a bit and started elongating before they fell off the spatula. This ended up being two minutes of the second boil.

Next quickly pour the jelly into the jars and bring it up to the HALFWAY mark only. You will NOT place the lids and rings on the jars yet, you need to make another layer.

Some of the jelly has probably run down the sides of the inside of the jars. You want to remove this as well as possible, so there there will be a clean, distinct line between the layers in the jars.
Use a corner of the sterilized cloth that you prepared to wipe any of this jelly from the sides of the jar.

Cover the jars with small pieces of plastic wrap, this will prevent 'the ickies' from getting in the jars while they set.


Wait until the jelly has set firmly before starting the next layer. After an hour I checked mine and they were fairly firm. It might be longer or shorter for you, depending on that batch of jam.

Now remove the plastic wrap and prepare a second batch of jelly, using the other color of grape juice. At this point you want to heat your lids too, since you will be sealing them after this layer.

When all of the jars are filled with the second layer, leaving 1/4 inch of headspace, place the lids and rings on the jars. Finally, process in a boiling water-bath canner for 10 minutes.

These look really nice, I hope they sell well. My next batch is going to take the visual-appeal one step further. The next batch will be a layer of apple jelly but with a maraschino cherry or two added, with a layer of white-grape jelly also with a maraschino cherry or two. At least it sounds good in my head, we will see when I do it in the next few days.

Just to show that the jelly really did set, and the colors didn't just settle, here is a jar turned on its side.

Wednesday, February 1, 2012

Pasta and Hot Dogs


I'm posting this because it is was fun, funny and unique!  My Facebook friend Lezlie showed me this and I just HAD to try it.  Someone in my Canning group on Facebook must have already known about this and has a name for it, "Octo-Dogs" which I thought was pretty darned funny.
This is so simple that my friends the Jamisons can do it(I think.)  Cut up some hot dogs to about 1 inch to 1.5 inches long.  Then stick 7 or 8 dried spaghetti noodles through them.  You can stick them halfway through or just barely through them, whatever strikes your fancy.


Cook them in boiling water until the pasta is done, about 12 minutes.  Hey, this is kid food (and Marty food) so it really doesn't matter that the hot dogs are over-done!  Then drain them in a colander and you should get something that looks like this:


Now simply pour some spaghetti sauce over them and you have a fun and funny kids' meal:


Now, how easy is that for a fun meal?

Next, I want to try my Italian friend Ron's idea of doing this with Italian Sausage!

Coming up, I cure and smoke a whole ham after buying a half-pig.

~ Marty


Thursday, January 5, 2012

Braided Onion Bread


Now ain't that purty...?

It is also easy to make. I think I got this from another website, and if I knew for sure if I did or not I would give that person the credit.

Ingredients

Bread
2 1/2 tsp (.25 oz) active dry yeast
1/4 cup sugar
3/4 cup water, warm (100-110F)
1/2 cup milk
3 tbsp vegetable oil
1 large egg
1 1/2 tsp salt
4 – 4 1/2 cups flour

Filling
2 tbsp butter
2 large cloves garlic, minced
1 cup diced sweet onion (such as Vidalia or Hawaiian)
1/4 tsp salt

Combine the yeast, sugar, and warm water. Let stand for 10 minutes or so until it starts to get foamy.

Stir in milk, vegetable oil, egg, salt and 2 cups of flour, mixing just until all the ingredients come together into a thick batter.

I used my KitchenAid, and using my dough-hook I mixed the dough on medium-low speed and gradually added the other 2 cups of flour. You may not have to add the last 1/2 cup of flour. The dough should pull away from the sides of the stand mixer when it is done. It should be soft, but not sticky.

Place the dough into a lightly greased bowl, cover with plastic wrap or like I do with a slightly damp towel. Let this rise in a warm, not hot, place for 60-90 minutes until it has doubled in size.

While dough rises, prepare the filling. Melt the butter in a small saucepan over medium-high heat. Add in minced garlic and saute for a few minutes, until garlic is fragrant. Remove from heat and pour butter and garlic into a small bowl. Add in diced onions and salt. Toss all of this to combine it. Set it aside and allow to cool.

When dough has risen, turn dough out onto a lightly floured surface. Gently deflate dough and press it down into a rectangle that is about 8 by 12 inches. Divide dough into three even pieces about 8 by 4 inches. Here is where differed from the recipe I had. I rolled out the 3 sections much larger than 8 by 4, probably more like 16 by 8. This made the bread easier to braid and made a longer loaf.


Carefully spread 1/3 of the onion mixture into the center (lengthwise) of one of the strips of dough. Pull in the sides to enclose the filling.


Pinch dough very firmly along the seam and at the ends to seal. Repeat with remaining dough strips.


Transfer dough strips to a parchment-lined baking sheet.
Braid three filled strips of dough together and pinch together the ends to finish the loaf.


Cover with a clean dish towel and allow bread to rise for 45 minutes.

Preheat oven to 375F. Bake for 35-40 minutes, until bread is a dark golden brown.

Allow bread to cool completely before slicing. Take a loaf over to a friend and give it away and impress the heck out of them!


Tuesday, November 15, 2011

Canning Venison (or beef)

If you have ever had canned beef or venison, you know that it is SO good and SO tender. It is amazing served over egg noodles, potatoes, and someone suggested to me today on Facebook to try a shepherd's pie with canned venison. That sounds so good that I just might make that a future post. These directions can be used for venison or beef. If you don't like venison (why not?) you will love how this beef tastes.

Canning venison/beef is extremely easy, that is, IF you are familiar with pressure-canning. If you are not familiar with it, I suggest buying the Ball Blue Book. This is THE authoritative book on home canning, and everything in it can be trusted.

You can use just about any cut of venison or beef for this. I don't use the better, more expensive cuts for this, because it tastes so good that you will THINK that you have a better cut of meat. For example, I am canning some beef (for my non-venison wife) right now and I am using round roasts that I found on sale.

First I recruited the help of my other 'girlfriend', Caly. Caly is a great help and good company. And she LOVES venison!


First you wash and heat your jars and lids properly, and prepare your canner. Cut out any excess fat from the meat. Then cut the meat into about 1-inch cubes.


Add some beef bouillon to the bottom of the jars, about 1 teaspoon to pints and 2 teaspoons added to quarts. Also place a slice of onion or two to the jars. Fill the jar within 1 inch of the rim (1 inch headspace.) I alternated meat and onion so that it has layers and looks nicer.


Now here is the kicker, don't add any liquid to the jars. It will make its own juices when it is processed. Process pints for 75 minutes and quarts for 90 minutes at 10 pounds of pressure. Of course, this needs to be adjusted according to your elevation.


And here is the final product, you will enjoy it! Now, to look up a good shepherd's pie recipe.....


Saturday, November 12, 2011

Layered Chicken-Vegetable Soup, Canned

I saw a picture of this online somewhere and I just HAD to make it. Now that I've made it I don't want to open the jars, they are just too pretty!


Here are the ingredients, but there is a lot of room for variations among the vegetables. Amounts are approximate for a one-quart jar:

1 cup cubed potatoes (peeled, raw)
1 cup sliced/cubed carrot
2/3 cup corn
2/3 cup green beans
1/2 cup cooked chicken meat (reserve the broth)
1 Tablespoon (or more if you like) Onion
2 Tablespoons chopped fresh Roma tomatoes
1/2 Chicken bullion Cube

Cook the chicken in seasoned, simmering water for about 20 minutes. Remove bones and excess fat, and cut into chunks.


I used baby carrots which made it easier to chop into a consistent size.


The corn and green beans were frozen. I wouldn't suggest using already-canned green beans or corn because they are going to cook AGAIN for a long time.

The potatoes were cut to about 3/4 inch cubes.


Layer each of these ingredients into a one-quart canning jar. Alternate darker and lighter colors for a good look to your layers. I arranged mine in this order; potato, carrot, green bean, chicken, corn, tomato, onion.


Cover with the broth that you made when you cooked the chicken meat, leaving 1 inch of headspace. PRESSURE CAN at 11 lbs for 90 minutes, allowing for your local elevation.

Something I did was I made extra chicken and broth. I saved the extra chicken for another meal, but then I canned the extra broth. First I allowed it to cool, then skimmed off the fat on top. Then I strained it thru a fine strainer. Muslin might be a good strainer for this, also. For the broth it was also processed for 90 minutes at 11 lbs of pressure. Now I have quart jars of chicken broth all ready for whatever I want to use it in.


Wednesday, March 9, 2011

Leftover Garden Peppers


I should have written about this last summer, but I had stepped away from the blog for a while. Between the wedding/honeymoon, then Sue moving in, this blog just wasn't a very high priority.

I just wanted to tell you a quick hint as to what to do with leftover garden peppers. And this applies to just about any pepper variety that you can grow. Basically I dehydrate them, then grind them into powder for use in many various recipes. I have a dehydrator, but this is NOT necessary since I did this for a long time before I had a dehydrator. You can simply use your kitchen oven.

Keep your peppers sorted by variety through this process. However, I put all mild/sweet peppers like sweet banana, bells, into one pile. I make a sweet-pepper powder out of all of these mixed together.

Cut the peppers into 1 to 2 inch pieces, I don't bother with skinning them first. For oven drying, set your oven to the lowest setting it will go, mine goes down to 170 degrees F. Place the peppers on some type of rack or screen that has holes small enough to keep them from falling through the holes. A screen works better than a cookie sheet because it allows air to circulate over the peppers better. Now place something that won't melt in the door of the oven to keep it cracked about an inch or so.

It will probably take you at least 12 hours for them to dry enough to grind. They need to be completely dry and crisp in order to be ground. Then grind them in a coffee grinder or food processor, even a blender will work. I use my blender because it is glass and the dry, hard pieces of pepper won't mar the glass like they do in my plastic Cuisinart food processor.

It's the same process with the dehydrator, drying them until they are totally dry and crisp.

Since I took the picture above, I have found some good supplies of decorative bottles and jars, and I also make labels on my computer. They look better and make great gifts this way.

I especially like the sweet-pepper powder. It adds a great pepper flavor to dishes but adds no heat.