Showing posts with label Home Smoking. Show all posts

Tuesday, April 20, 2010

Smoked Tomato Soup

My brother-in-law Jim was the executive chef in a restaurant in California for many years, Slocum House, and one of his specialties was Smoked Tomato Soup. I never had the pleasure of tasting it at the restaurant, but my interest was piqued when he told me about it. This isn't his recipe, I wanted to see how I could do on my own. I didn't write down things as I went (duhhh...) but this is pretty close to how I did it.

4-5 pounds fresh beefsteak tomatoes(or any large variety for that matter)
Olive oil
1 cup finely chopped onions
Salt and pepper
Pinch of cayenne
2 tablespoons minced garlic
1/2 gallon chicken stock
1/4 cup finely chopped parsley
1 cup heavy cream
Fresh basil sprigs

First I washed the tomatoes then sliced in half. Then I removed most of the seeds by squeezing gently and scraping seeds off


This is an easy way of seeding tomatoes


Next I put the tomatoes in a bowl and poured a tablespoon or two of olive oil over the tomatoes and mixed them well. I fired up the smoker and kept it on a low temperature but a good amount of smoke. Most recipes that I saw online called for smoking for about 30 minutes. I'm a guy, so I think that if 30 minutes of smoking is good, then 2-3 hours must be even better. I was NOT disappointed.

I'm sure if you like smoking foods, I am sure that this is a lovely sight to you also:


After smoking it's back to the kitchen with the 'maters'.
In a pot I added the garlic, smoked tomatoes, some salt and pepper to taste, and the onions. I added 2 quarts of chicken broth, brought it to a boil, then reduced the heat to a simmer and cook for 1 hour or so. Using a blender (a hand-held blender would have been perfect in this situation) I pureed the soup, leaving it slightly chunky. Then I stirred in the parsley, then the heavy cream. If needed you can re-season with salt and pepper. Right before serving you can add a sprig of fresh basil to the bowl if you would like.

This turned out so good; thick, smokey, rich. You can bet that I will be making this again soon.

Friday, April 9, 2010

Smoked Beef Tenderloin

This is another idea sparked by a meat sale at a local grocery. I found some whole beef tenderloins marked down 40%. I wanted to buy all 7 of them, but that would have been about $300.00, so I settled for one. I've been using my new smoker a lot lately and figured 'why not smoke it?'.

It was about 5.5 lbs, so I cut it in half (there are only 2 of us here now.) The seasoning that I placed on the outside of it was only freshly-cracked pepper and salt. Then into a low-heat, heavy smoke for a few hours.


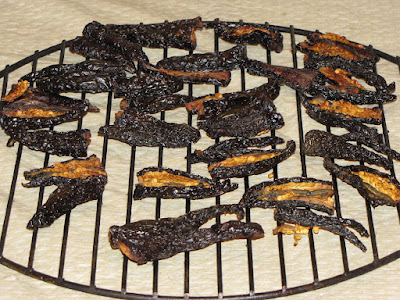
Just for kicks and giggles I smoked some jalapeno peppers while I had the smoker going. I smoked those for a lot longer time, then finished drying those in the oven on a very low setting. Then I ran them through my food processor for smoked jalapeno powder.

After the tenderloin smoked for about 3 hours, I placed it on a very hot grill and charred it for about 5 minutes or so on each side


It came out a perfect medium-rare. It looked so good it seemed like a crime to eat it!


I risked imprisonment and ate it anyway. Oh my goodness gracious, it was one of the best pieces of meat I had ever eaten! It was so tender I could have cut it with a dull butter knife. The outside was charred perfectly and gave it a fantastic flavor.

I had some left over, so after it cooled in the fridge overnight I ran it through my meat slicer. I have plans to flash fry it quickly with some portabellas that I just bought, unless I come up with a better idea.

I am going to keep my eyes peeled for another whole beef tenderloin!

Monday, February 8, 2010

New smoker!

My girlfriend really takes care of me! For my birthday Sue bought me a new smoker. I had thought of building one (still might build a cold smoker) and I was disillusioned at a lot of the prices I saw on some of the smokers I saw online.

This one is a very nice compromise between size and cost. It was $189.00, at Sears of all places. I hadn't been looking at Sears before I stumbled across this one. It has 4 shelves, shelves large enough to handle a half of a pork belly, or at least a medium sized turkey. It is large enough to handle 95% of my smoking needs so I am REALLY happy about it.

"Some assembly required" means that I spent 2 hours assembling it. However, it was so much fun it didn't bother me at all (I was watching the Super Bowl while I was doing it anyway!)

Here is what it looks like


And with the door open


So look out! I will be smoking a lot of things now. My pork loins have been curing in the refrigerator for about 5 days now, so I will smoke those first, tomorrow. Then my pork butt will be finished curing in a few days and I will be doing a much longer smoking with that one.

The only thing I can foresee doing with this smoker is building a block stand for it, to make it more easily accessible. I might add a gasket to the door to make it tigher also, but I don't know yet.

Can you tell I am excited?!?!? Well, I am. Sue knows how to take care of me; nothing says love like a new smoker...

Tuesday, January 26, 2010

Smoked Beef Ribs

This is one of those things that turned out so good I wanted to serve it up to the whole neighborhood just to show it off! I saw some beef ribs at the store and thought that my babyback/sparerib recipe would be just the ticket for them. Luckily they turned out just the way my pork ribs do; juicy, tender, full of flavor.

The secret to great ribs

You probably know people that boil their pork ribs for tenderness. Yes, they are tender, but they might as well be unflavored pudding since all of the flavor is cooked out of them. About 7 or 8 years ago I got the idea of pressure cooking them, thinking that I can get the same tenderness without losing the flavor, and not having to slow smoke them all day. Then I follow that up with a few hours of smoking. It works great! And as you will see, it works great for beef ribs too.

First, into my pressure canner at 15 lbs for 20 minutes


As soon as the pressure is down to zero and it is safe to remove them, they go on the smoker for 4 hours


Here they are after being smoked


Now for a good sauce. I usually just 'wing-it' when I make bbq sauce and it always comes out the same (very well, if I may say so myself) but this time I actually wrote down the ingredients and measurements.

Marty's Kansas City Style Rib Sauce

3 cups catsup
1/2 cup brown sugar
1/3 cup balsamic vinegar
1/4 cup prepared mustard, any mustard that you like, I used a plain yellow mustard this time
2 Tablespoons molasses
1 teaspoon liquid smoke
1 teaspoon garlic powder
1 teaspoon onion powder

Heat all this up in a pan on low to medium heat for about 15 minutes or so, to blend the flavors well. This is my quick sauce, when I have more time and ambition I sautee finely chopped onions and add some other things like lemon juice. The next time I make a really good sauce I will post that.

The pressure cooking makes these so juicy and tender, and the smoker gives them the best rib flavor you ever had.

Wednesday, January 20, 2010

Hamming it up

I wanted to make a ham and smoke it, but didn't want to work with a whole pork leg. Knowing that you can make 'ham' from a lot of different pork cuts, I looked for a sale on a good, large cut of pork. There was an 8 lb. package of 'pork sirloin' that looked like it would make a good ham and bought it for 1/2 off because it was nearing the expiration date (again, I LOVE the 'Manager's Specials' at Kroger!)


Ham making is almost identical to making Canadian bacon that I wrote about earlier. It's just a larger cut of meat than the pork loins that I use for the Canadian bacon, and I won't be rubbing the outside of the meat with spices as I do with the bacon.

This will have to cure in a brine for about 4 days. Some articles call for 4-5, some 5-7, depending on the amount of saltiness that you want. I messed up a batch of Canadian Bacon once, making it way too salty, so I will start on the low side for this first-time batch.

BRINE INGREDIENTS

For every gallon of water:
1 cup of pickling salt
1/2 cup sugar
1/3 cup Instacure (Prague Powder, Pink Salt)
1 Tablespoon of Pickling Spice
1/2 teaspoon of Cloves


Mix all of the ingredients into the water well. You can use warm water so that it all dissolves easier, but you have to cool it to 40 degrees or below before adding the meat. I just used cold water, stirred a LOT, and then cooled it to 40 degrees.
Then place it into your container. I used my new plastic container I am using for meat curing and rubbing.


I placed the lid on the tub and put the tub in the bottom of my refrigerator. After 5 days it was time to smoke it. First I dumped the water out of the tub and replaced it with fresh cold water. I let that sit for an hour, then replaced it again. This is done to remove excess salt.

After draining the water again and patting the meat dry, I placed it on the smoker for about 4 hours to get a good smoke flavor on the meat.


After smoking I bring it up to the safe-pork temperature of 160 degrees in my oven. I place the meat in aluminum foil, add a little water, close it up and place it in a 300 degree oven until it reaches 160 degrees, measured with a probe thermometer in several places of the meat.

I wanted to slice about half of it for sandwich slices, so I cooled it in the refrigerator, still in the foil. That took a couple of hours, then brought out my new handy-dandy meat slicer.


Now I have a couple of pounds of sliced ham, plus a couple of 2-3 pound chunks for other purposes.

The flavor was excellent, the meat was SLIGHTLY on the dry side. The next time I will make sure the smoker's temp stays low, with plenty of smoke. This could have been from the cut of pork also; more experimenting is in order. All in all, it's some pretty good ham!

* Jan 16 2012 added note:  I got a half pig and had the butcher keep the ham intact, raw, uncured and unsmoked.  I am in the process of curing the whole thing.  I will post the results and process in a future blog!

Monday, January 18, 2010

Smoked Pork Butt

I've been accused of being a pig's butt, however that is not what we are talking about today. The butt is the butt-end of the pork shoulder, thus pork 'butt'. Pork shoulder is the Lord's way of telling smokers and grillers that he loves us, died for us, and that He is full of grace.

I found a good deal on a pork butt that was about 5 lbs or so. I swear the thing was calling my name from the meat case at Kroger. It is a well marbled piece of pork, and fat is something that is missing from most of today's store-bought pork. SOME fat is a good thing.

I also went to 'The Container Store' and guess what I bought? A container! I finally bought a dedicated plastic container for brining, curing and rubbing meats. It fits in the bottom of my fridge perfectly, and can stack them if needed. I can fit a pork belly cut in half, a couple of pork loins, and probably could have fit two of these pork butts in one of the containers.

I decided to brine the butt ahead of time. I have had great success in brining different meats so far and thought this would be a good experiment.
For the brine I used:

A gallon of water
3 cups of canning salt
a cup or so of dark corn syrup
- a couple of brine recipes called for molasses, but I was out of molasses. I could have used brown sugar, or nothing, but got the wild idea of adding the corn syrup. I guess we will find out how it worked. I am typing this while the butt is on the smoker.

If I had two pork butts I would have needed less liquid, the important thing is to cover the meat with the liquid. After mixing the brine, I put the lid on and refrigerated it for about 18 hours. I wanted to brine it for 24 hours but my impatience kicked in every time I opened the refrigerator and the meat was staring at me.


The next day I drained the brine and replaced it with cold fresh water,and let it sit for about a half hour in the water. After draining the water again, I patted the meat DRY.

I put the butt back into my new fancy-schmancy container and mixed a rub. This is what I use for a rub when I want a standard Kansas City style rub.

1/2 cup brown sugar
1/4 cup paprika
1 tablespoon black pepper
1 tablespoon salt
1 tablespoon chili powder
1 tablespoon garlic powder
1 tablespoon onion powder
1 teaspoon cayenne/jalapeno/Anaheim powder I used my homemade jalapeno powder.

You can get creative however, and use whatever ingredients you want. I have 'winged-it' many times and have come up with some good mixes.

I used GENEROUS amounts of the rub. And I RUB my rub into the meat well. Many articles on rubs and meats state that it isn't necessary to rub the rubs into meat, I say 'meadow-muffins.' It's called a rub for a reason, and I want the rub to stick and get as deep into the meat as possible. -stepping down off soapbox-


I placed the butt on the smoker, using hickory chunks, but use whatever wood you want. I plan on smoking this for about 10-12 hours, but will monitor it as the day progresses. Here's what it looks like, the picture was taken soon after placing the butt on the smoker.


- "Later that day" -

Here is what it looked like after about 10 hours of smoking


It wasn't quite up to the FDA's safe temp of 160 degrees for pork (Rytek Kutas, THE man of smoked meats, states 152 is the safe temp for pork, but let's go with 160.) I placed it in heavy duty aluminum foil, added a small (1/4 cup?) of water, closed it up and placed in a 250 degree oven. I ended up cooking it this way for another 5-6 hours.

I took a fork and started to pull it, but most of the time I only needed my fingers, it was that tender.


Now to cook up a good sauce!

Wednesday, December 30, 2009

Smoked Turkey Breast

I was in the grocery store the other day and found some good deals in the 'Manager's Specials' section. Those are the meats that are close to the expiration dates and marked down considerably. That's the first thing I check when I go to the store. Meat that is aged in the proper temperature, of course for not too long, is very good. When I shoot a deer I like to hang it for 5-7 days if it is cool enough (under 40 degrees maximum), so I have NO problem buying most of those specials.

I found all of these for 50% off; a huge turkey breast, a brisket, a large flank steak and some frog legs. I figured I could smoke the turkey, make corned beef with the brisket, jerky with the flank steak and I could be daring and try smoking the frog legs. Hopefully that will be a new post here in the very near future.

I had great success with brining the Thanksgiving turkey so I thought I might try brining this turkey breast before smoking it. For the brine I used:

1/2 gallon of water
1/2 cup of canning salt
A few smashed garlic cloves
About a teaspoon of onion powder (I was out of onions)
2 teaspoons of Instacure (pink salt, Prague powder) This is optional, I was winging it and thought I would try it.

I mixed all of this up and placed the breast into the bowl and let it sit in the fridge for 24 hours. After this I patted it dry and placed it on my smoker.

I smoked it for about 4 hours but this did not bring it up to a safe temperature of 165 degrees(I need to build a bigger, better smoker!) This is not a problem though. I wrapped it in foil, poured a few Tablespoons of water into the foil, closed it up and placed it in a 300 degree oven. After about 45 minutes it was at 160 degrees. When you pull it out of oven, the temperature actually rises as it rests, and it did go to 165 degrees.


I placed it in the refrigerator until it cooled down considerably and became more firm for slicing. The fun part was using my new meat slicer that my girlfriend Sue gave me for Christmas. Nothing says love more than a Waring meat slicer! Ha!

I sliced it fairly thin and tasted it, I thought I had gone to heaven! It was that good. Take a look:


Turkey breast can be bought cheaply, so try this sometime.

Tuesday, October 6, 2009

Canadian bacon


I've made Canadian bacon a couple of times and it has really turned out well. It tastes good with a lot of things, but my son's favorite is homemade "Egg McMuffins"; a muffin, egg, a good cheese and a slice or two of this Canadian bacon. Use a pork loin, not a pork tenderloin. Mine was 5-6 lbs. In a nutshell the loin is cured in the refrigerator for 5 or 6 days, then it is smoked for a few hours.

My brine is usually something like the following. It varies a little, depending on what I feel like adding to it at the time.

Water to cover the meat, usually about a gallon, depending on the container you are curing it in.
For every gallon of water use:

- 2 Tablespoon of Instacure #1 (Prague Powder) for every half gallon of water.  Some recipes call for more Instacure, I tend to go lighter on it.  - OR use the appropriate amount of Morton's Tender Quick. I don't know the conversion factor, since Tender Quick has the salt and the curing salt combined.
- 4 Tablespoons of canning salt.
- 5 to 10 (depending on your taste, I use 10) smashed garlic cloves. Take a wide-bladed knife turned sideways or something similar and smash the garlic on your counter, but not so hard that it flies into pieces. This releases the garlic oils and taste.
- About a Tablespoon or so of onion flakes.
- 1/4 cup or so of sugar, preferably brown sugar.

Some optionals; be creative, there are a lot more options than these:
- 2 or 3 FRESH bay leaves. If you don't have a bay tree growing in a container, get one! Once you've had fresh bay you will never go back.
- a teaspoon of fresh-cracked pepper.
- a Tablespoon, or more, or less, depending on you, of a hot-pepper powder. If I add pepper I use dried jalapeno powder because I dry my own jalapenos.

Put the meat into a bowl/pot large enough to hold it, covered with the brine. It looks awful in this picture but that is because the water has spices and such in it. The piece of meat in the middle is the pork loin, the other smaller pieces were something else I was working on at the same time:


Place something on top of the meat to hold it under the surface of the brine. I usually use a small plate with a mug full of water to weigh it down. Keep it in the refrigerator for 5 or 6 days.
When the loin is done curing, pour out the liquid and replace with clean water. Let the meat soak in the water for about an hour, and change the water 2-3 times. This will remove some of the saltiness. You can get creative with your rub at this point, but I covered this one only in fresh-cracked pepper. I ran out of pepper, and usually cover the meat a lot more than this:


Next I place it on my smoker.


I have a small smoker and it is hard to regulate a good cooking temperature, so first I smoke it at a low to medium smoker heat for about 3 hours. I like to get it to a safe heat of 160 degrees, and I don't want to dry it out, so I finish it up in the kitchen oven. I wrap the loin in heavy duty aluminum foil and pour in a small amount of water.
At 350 degrees I think it took an hour or two to get it to an internal temperature of 160 degrees, checked with a meat thermometer.

After the loin has reached 160 degrees, I remove it and let it rest for about 30 minutes.


Next simply slice it up. I usually slice it about 1/8th to 1/4th of an inch, but the thickness is up to you.


I usually store half of it vacuum-packed in the freezer, it seems to stand up to freezing well. However, there is nothing like a fresh piece!

Wednesday, April 22, 2009

Chipotle Cheddar

Back in the beginning of March I got the idea to make some chipotle peppers. Chipotles are smoked jalapenos, if I remember correctly they are red jalapenos. Since I was limited to store-bought jalas I had to settle on green ones. I started a low-heat smoke and smoked them for about maybe 8 hours, but I think it was longer. The idea is to smoke them, dry them, but not cook them.


From Cooking, Canning, Gardening


After smoking the peppers I placed them in the oven to dry them completely. I dry herbs and other things in this same manner. Place your oven at the lowest temperature it will go, generally this is 150-170 F, and leave the door of the oven cracked. I sometimes turn the oven off from time to time, just so that it doesn't get too warm. Again, I want to dry them, not cook them.

After they are dried, they can be put into oil, or an adobo sauce, or ground. I ground mine in my coffee grinder. If you do this, be *SURE* to wash out the grinder completely before using it for coffee. Otherwise the resulting coffee will REALLY wake you up.

I wont go into all of the cheese making steps, that will have to come in another post. But what I did was to make a cheese but not age it. It doesn't have some of the flavor that an aged cheese will have, but it is done in 24 hours. I do this occasionally when I need a 'quick fix', and it turns out well.

First I boiled 1.5 TB of the chipotle powder in about 1/4 cup of water for 10 mins. You have to watch this closely so that it doesn't boil dry. Add a bit of hot water if it starts drying too much in the pan.

I used two gallons of milk (store-bought) 1/2 tsp of Calcium Chloride, homemade cheese culture** and 1/2 tsp of rennet to set the curds at 90 degrees. Before adding the rennet to curdle the milk, I stirred in the chipotle powder in water.

After the curds set, the curds were cut into 1/2 inch cubes, then the temp was raised to 100 degrees over about 30 mins. The curds were then poured into a piece of cheesecloth (muslin, not the standard 'cheesecloth' that you see in stores) and drained for over an hour hanging over a bowl.

After draining, the curds are broken up and placed in a bowl and 1 TB of canning salt mixed in thoroughly. Then it was placed into a mold and that placed on my newly-built cheese press.

From Cheese Making


It's a graduated process to press the cheese. First it is pressed at a 10 lbs of pressure for 10 minutes, then the cheese is flipped over in the mold, pressed again for 10 minutes. Then it is flipped again and pressed at 40 lbs of pressure for 12 hours. Since most recipes are written for 4 inch molds, and the homemade molds that I used this time are 8 inches in diameter, I had to double the weight.

Then I let it air-dry for a few hours to get a bit of a rind on it, and I was done. It really has great flavor and a bit of kick to it also.

From Cheese Making


From Cheese Making

** I doubt that the culture was necessary since this is not an aged cheese, I think I did it out of habit more than anything. However, I make my own mesophilic culture and that is very easy. Take a pint of buttermilk and let it sit at room temperature overnight. Pour it into ice cube trays and when it is frozen, break out the cubes and place them in a freezer bags and place in freezer. They will keep for a month this way.
Also, I noticed after posting this that the cheese looks a lot more lumpy/crumbly in the photographs than it really is in real life.

Thursday, March 26, 2009

Smoked Meatloaf

I've read where people have smoked their meatloaf and I had to try it. I used a simple meatloaf recipe to try this, use any meatloaf recipe that you would like to use. Here is what I used though:

2 lbs ground beef


1 medium onion, chopped fine

1/2 green pepper, chopped fine

3 cloves garlic, minced

1 cup bread crumbs

2 eggs, beaten

1 cup catsup

1/4 cup milk

Mix all of these together in a bowl.

From Cooking, Canning, Gardening


On a couple of layers of heavy-duty foil, form into a loaf.

From Cooking, Canning, Gardening


Then, on to the smoker for about 4 hours.

From Cooking, Canning, Gardening


Here's what it looks like after smoking:

From Cooking, Canning, Gardening


And, just like momma used to do, covered in a catsup and brown sugar mix:

From Cooking, Canning, Gardening


Simple, easy, and oh-so-good! It tasted great.

Smoked Italian Sausage

I made one goof/oops when making this, thus it turned out just 'ok'. I will explain later. However, it was a lot of fun to make and I learned a lot. This can be used simply as bulk sausage, but I wanted to play with my new toys, and stuff it in casings.

Ingredients;

5 lbs ground pork shoulder or butt

2 T salt

3 tsp fennel seed

2 T sugar

1 T crushed hot peppers (made from my garden peppers, of course!) Skip this or cut it down if you don't like hot Italian Sausage.

1 tsp caraway seed

3 tsp coriander

about 5 cloves of crushed garlic

1/2 cup of cold water


Grind the meat with coarse grinding plate (or buy it pre-ground.) Grind the salt, fennel, sugar, pepper, caraway and coriander together. Mix spice mixture into meat, along with garlic and water. 'Git yer hands in there and git'r done well.'

At this point you have Italian Sausage and you could bag it, or vacuum pack and freeze. However, this is where I got my sausage stuffer out. My stuffer is actually a meat grinder with a sausage-stuffing funnel/tube on the end.

From Blogger Pictures


First, I soaked the casings ('casings' is the nice way of saying pig intestines) in cold water for a half hour. Then I ran water through the casings to rinse out the excess salt, which they are packed in. Then you coat the stuffing tube with vegetable shortening, and slide the casing over the tube. Then tie a knot in the exposed end.

I stuffed the casings snugly but not excessively, for I need to pinch links off after stuffing the casing. First I stuffed the entire 5 lbs into one long roll, with no individual links.
From Cooking, Canning, Gardening


I make links by pinching the roll every 6-8 inches and rolling every other link in the same direction.
From Cooking, Canning, Gardening


Then I placed the sausage on the smoker, with low heat and a good amount of smoke.

From Cooking, Canning, Gardening


I was hoping to do this for about 4 hours, but this is where I goofed. I evidently put too much, and too dry, wood on at one point, and the wood caught fire. This caused much more heat than I wanted, but I didnt find out until it was too late. No, they weren't burned but they had dried way too much. I didn't add extra fat, so they were going to be much leaner than store-bough sausage anyway, but this overheating dried it more than I would have liked.

It still tastes good, it's just not the juicy (fatty) sausage that you would buy in a store.

From Cooking, Canning, Gardening


I cooked up several links in a spaghetti sauce, served over penne pasta, and it was really good regardless.

Next time, MAYBE I will add some extra fat, but definitely will mind the smoker a bit more closely!

Wednesday, March 11, 2009

Homemade Pastrami


My goal in life lately has been to get to the point where Cowgirl(http://cowgirlscountry.blogspot.com/) will be jealous of my food, rather than vice-versa. She is definitely the one I admire the most of any of the cooking bloggers I have seen, hands-down.
-
After making a number of batches of corned beef, I wanted to take it one step further and make pastrami. This is another project where plannning comes into play, for the brining of the meat takes 2-3 weeks.

I would have used a beef brisket, but have found some lesser-quality (cheaper!) cuts do fairly well too. I bought a very cheap 2.5 lb beef round roast at about $1.50 lb, since I have NO qualms about buying the roasts that are marked down in their last day in the grocery store.)
Next you brine and spice the roast in a freezer bag in the fridge for a couple weeks. For this, see my post "Corned Beef" dated 10/22/2008.
After that has brined for 2 or 3 weeks, I put it in a bowl of cold water to remove some of the salt for 30-60 minutes.

Then I added a generous amount of rub. The recipe I followed, for this 'small' 2.5 lb roast, was:
2.5 T kosher or canning salt
2 T paprika (cowgirl would've had the paprika already smoked!
1.5 T coriander seeds
1.5 T brown sugar
1 T black peppercorns
1 T yellow mustard seeds
1/2 T white peppercorns
8 cloves garlic, minced
Grind all this together in your spice or coffee grinder, then rub this all over the meat, being very generous with the amount you use. I've read articles that state that rubs aren't really rubbed in, its just called a rub. Meadow-muffins, rub that stuff into the meat.

My goal was to smoke this for about 4-5 hours, but after 2 hours the wind REALLY kicked up. This really robs the heat from my bullet-smoker, and I had to improvise. I read some articles online about making pastrami in the kitchen oven, and had to employ this after the meat was smoked for 2 hours.
With the wind ruining my plans, I wrapped it up twice in heavy-duty aluminum foil and placed it in a 225 oven. I baked it this way for 3.5 more hours. After it cooled somewhat I placed it in the fridge overnight.
The next morning, I was astounded at how good this looked. I took a thinly-sliced pieces and steamed them for about 30 minutes (many restaurants steam them for 4-5 hours) and tasted it.
It wasnt the most lean, tender meat in the world but you didn't notice because the flavor was out of this world. Sometime I will try a better cut of meat. Shoot, this was so good I am barely motivated to pay 200% more money to get something 10% better in quality than this.
Heck, I was impressed. Maybe even the cowgurl is impressed. I know my gurlyfriend Sue will be, but she's like that!