Wednesday, March 14, 2012

Marty's Layered Purple & White Grape Jelly


There is a big women's event coming up at our church in April, the 10th Annual Ladies Gala.

They allow certain vendors to sell items, and I signed up to sell jellies and jams. I have been thinking of ideas for jellies and jams that are different, unique and/or have eye-appeal. This past week I came up with the idea for layered jelly. Just to see if there was actually someone else that had done it before, I surfed the net and found nothing. Someone somewhere has probably done this before, but I didn't see any web postings.

This ended up being fairly simple. Each of the layers have the same ingredients (except for the color of the grape juice.) Also, I worked with grape juice instead of grapes and that is a HUGE time saver.

I am going to make an assumption here that anyone trying to do this has at least SOME experience in jelly/jam making. It will save me the time of typing out each and every little instruction! My yield for this was 10 half-pint jars.

Ingredients for each layer:
3 cups of grape juice (4 cups for the white jelly and 4 cups for the purple jelly)
4 cups of sugar
1 packet of pectin powder
1/2 teaspoon of butter (optional, reduces foaming)
Also get a clean, sterilized cloth ready by boiling it in water, I will talk about why you do that later.

Add the 4 cups of juice of the color you want on the bottom of the jar, the pectin and butter to a large pot. You will get splattered with very hot drops of jelly if you use a small pot! Stirring constantly on high heat, bring the juice up to a very hard boil. Then add all of the sugar at once, keeping the heat on high, and constantly stirring.

Bring again to a FULL ROLLING BOIL, a boil that does not go away when stirred. Most jelly recipes will tell you to boil for exactly one minute at this point. I needed to insure that this jelly set right, and set firmly. You need to get it to the point where the jelly sheets, or at least drips a lot slower than normal from the spatula or spoon. So at the one-minute mark I started dripping juice from the spatula, until the drips slowed down quite a bit and started elongating before they fell off the spatula. This ended up being two minutes of the second boil.

Next quickly pour the jelly into the jars and bring it up to the HALFWAY mark only. You will NOT place the lids and rings on the jars yet, you need to make another layer.

Some of the jelly has probably run down the sides of the inside of the jars. You want to remove this as well as possible, so there there will be a clean, distinct line between the layers in the jars.
Use a corner of the sterilized cloth that you prepared to wipe any of this jelly from the sides of the jar.

Cover the jars with small pieces of plastic wrap, this will prevent 'the ickies' from getting in the jars while they set.


Wait until the jelly has set firmly before starting the next layer. After an hour I checked mine and they were fairly firm. It might be longer or shorter for you, depending on that batch of jam.

Now remove the plastic wrap and prepare a second batch of jelly, using the other color of grape juice. At this point you want to heat your lids too, since you will be sealing them after this layer.

When all of the jars are filled with the second layer, leaving 1/4 inch of headspace, place the lids and rings on the jars. Finally, process in a boiling water-bath canner for 10 minutes.

These look really nice, I hope they sell well. My next batch is going to take the visual-appeal one step further. The next batch will be a layer of apple jelly but with a maraschino cherry or two added, with a layer of white-grape jelly also with a maraschino cherry or two. At least it sounds good in my head, we will see when I do it in the next few days.

Just to show that the jelly really did set, and the colors didn't just settle, here is a jar turned on its side.

Wednesday, February 1, 2012

Pasta and Hot Dogs


I'm posting this because it is was fun, funny and unique!  My Facebook friend Lezlie showed me this and I just HAD to try it.  Someone in my Canning group on Facebook must have already known about this and has a name for it, "Octo-Dogs" which I thought was pretty darned funny.
This is so simple that my friends the Jamisons can do it(I think.)  Cut up some hot dogs to about 1 inch to 1.5 inches long.  Then stick 7 or 8 dried spaghetti noodles through them.  You can stick them halfway through or just barely through them, whatever strikes your fancy.


Cook them in boiling water until the pasta is done, about 12 minutes.  Hey, this is kid food (and Marty food) so it really doesn't matter that the hot dogs are over-done!  Then drain them in a colander and you should get something that looks like this:


Now simply pour some spaghetti sauce over them and you have a fun and funny kids' meal:


Now, how easy is that for a fun meal?

Next, I want to try my Italian friend Ron's idea of doing this with Italian Sausage!

Coming up, I cure and smoke a whole ham after buying a half-pig.

~ Marty


Thursday, January 5, 2012

Braided Onion Bread


Now ain't that purty...?

It is also easy to make. I think I got this from another website, and if I knew for sure if I did or not I would give that person the credit.

Ingredients

Bread
2 1/2 tsp (.25 oz) active dry yeast
1/4 cup sugar
3/4 cup water, warm (100-110F)
1/2 cup milk
3 tbsp vegetable oil
1 large egg
1 1/2 tsp salt
4 – 4 1/2 cups flour

Filling
2 tbsp butter
2 large cloves garlic, minced
1 cup diced sweet onion (such as Vidalia or Hawaiian)
1/4 tsp salt

Combine the yeast, sugar, and warm water. Let stand for 10 minutes or so until it starts to get foamy.

Stir in milk, vegetable oil, egg, salt and 2 cups of flour, mixing just until all the ingredients come together into a thick batter.

I used my KitchenAid, and using my dough-hook I mixed the dough on medium-low speed and gradually added the other 2 cups of flour. You may not have to add the last 1/2 cup of flour. The dough should pull away from the sides of the stand mixer when it is done. It should be soft, but not sticky.

Place the dough into a lightly greased bowl, cover with plastic wrap or like I do with a slightly damp towel. Let this rise in a warm, not hot, place for 60-90 minutes until it has doubled in size.

While dough rises, prepare the filling. Melt the butter in a small saucepan over medium-high heat. Add in minced garlic and saute for a few minutes, until garlic is fragrant. Remove from heat and pour butter and garlic into a small bowl. Add in diced onions and salt. Toss all of this to combine it. Set it aside and allow to cool.

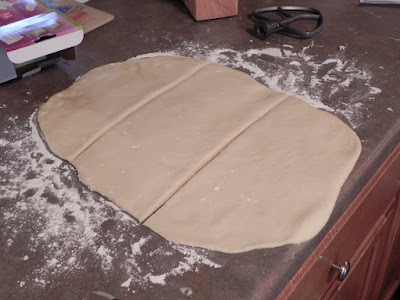
When dough has risen, turn dough out onto a lightly floured surface. Gently deflate dough and press it down into a rectangle that is about 8 by 12 inches. Divide dough into three even pieces about 8 by 4 inches. Here is where differed from the recipe I had. I rolled out the 3 sections much larger than 8 by 4, probably more like 16 by 8. This made the bread easier to braid and made a longer loaf.


Carefully spread 1/3 of the onion mixture into the center (lengthwise) of one of the strips of dough. Pull in the sides to enclose the filling.


Pinch dough very firmly along the seam and at the ends to seal. Repeat with remaining dough strips.


Transfer dough strips to a parchment-lined baking sheet.
Braid three filled strips of dough together and pinch together the ends to finish the loaf.


Cover with a clean dish towel and allow bread to rise for 45 minutes.

Preheat oven to 375F. Bake for 35-40 minutes, until bread is a dark golden brown.

Allow bread to cool completely before slicing. Take a loaf over to a friend and give it away and impress the heck out of them!


Tuesday, November 15, 2011

Canning Venison (or beef)

If you have ever had canned beef or venison, you know that it is SO good and SO tender. It is amazing served over egg noodles, potatoes, and someone suggested to me today on Facebook to try a shepherd's pie with canned venison. That sounds so good that I just might make that a future post. These directions can be used for venison or beef. If you don't like venison (why not?) you will love how this beef tastes.

Canning venison/beef is extremely easy, that is, IF you are familiar with pressure-canning. If you are not familiar with it, I suggest buying the Ball Blue Book. This is THE authoritative book on home canning, and everything in it can be trusted.

You can use just about any cut of venison or beef for this. I don't use the better, more expensive cuts for this, because it tastes so good that you will THINK that you have a better cut of meat. For example, I am canning some beef (for my non-venison wife) right now and I am using round roasts that I found on sale.

First I recruited the help of my other 'girlfriend', Caly. Caly is a great help and good company. And she LOVES venison!


First you wash and heat your jars and lids properly, and prepare your canner. Cut out any excess fat from the meat. Then cut the meat into about 1-inch cubes.


Add some beef bouillon to the bottom of the jars, about 1 teaspoon to pints and 2 teaspoons added to quarts. Also place a slice of onion or two to the jars. Fill the jar within 1 inch of the rim (1 inch headspace.) I alternated meat and onion so that it has layers and looks nicer.


Now here is the kicker, don't add any liquid to the jars. It will make its own juices when it is processed. Process pints for 75 minutes and quarts for 90 minutes at 10 pounds of pressure. Of course, this needs to be adjusted according to your elevation.


And here is the final product, you will enjoy it! Now, to look up a good shepherd's pie recipe.....


Saturday, November 12, 2011

Layered Chicken-Vegetable Soup, Canned

I saw a picture of this online somewhere and I just HAD to make it. Now that I've made it I don't want to open the jars, they are just too pretty!


Here are the ingredients, but there is a lot of room for variations among the vegetables. Amounts are approximate for a one-quart jar:

1 cup cubed potatoes (peeled, raw)
1 cup sliced/cubed carrot
2/3 cup corn
2/3 cup green beans
1/2 cup cooked chicken meat (reserve the broth)
1 Tablespoon (or more if you like) Onion
2 Tablespoons chopped fresh Roma tomatoes
1/2 Chicken bullion Cube

Cook the chicken in seasoned, simmering water for about 20 minutes. Remove bones and excess fat, and cut into chunks.


I used baby carrots which made it easier to chop into a consistent size.


The corn and green beans were frozen. I wouldn't suggest using already-canned green beans or corn because they are going to cook AGAIN for a long time.

The potatoes were cut to about 3/4 inch cubes.


Layer each of these ingredients into a one-quart canning jar. Alternate darker and lighter colors for a good look to your layers. I arranged mine in this order; potato, carrot, green bean, chicken, corn, tomato, onion.


Cover with the broth that you made when you cooked the chicken meat, leaving 1 inch of headspace. PRESSURE CAN at 11 lbs for 90 minutes, allowing for your local elevation.

Something I did was I made extra chicken and broth. I saved the extra chicken for another meal, but then I canned the extra broth. First I allowed it to cool, then skimmed off the fat on top. Then I strained it thru a fine strainer. Muslin might be a good strainer for this, also. For the broth it was also processed for 90 minutes at 11 lbs of pressure. Now I have quart jars of chicken broth all ready for whatever I want to use it in.


Wednesday, March 9, 2011

Leftover Garden Peppers


I should have written about this last summer, but I had stepped away from the blog for a while. Between the wedding/honeymoon, then Sue moving in, this blog just wasn't a very high priority.

I just wanted to tell you a quick hint as to what to do with leftover garden peppers. And this applies to just about any pepper variety that you can grow. Basically I dehydrate them, then grind them into powder for use in many various recipes. I have a dehydrator, but this is NOT necessary since I did this for a long time before I had a dehydrator. You can simply use your kitchen oven.

Keep your peppers sorted by variety through this process. However, I put all mild/sweet peppers like sweet banana, bells, into one pile. I make a sweet-pepper powder out of all of these mixed together.

Cut the peppers into 1 to 2 inch pieces, I don't bother with skinning them first. For oven drying, set your oven to the lowest setting it will go, mine goes down to 170 degrees F. Place the peppers on some type of rack or screen that has holes small enough to keep them from falling through the holes. A screen works better than a cookie sheet because it allows air to circulate over the peppers better. Now place something that won't melt in the door of the oven to keep it cracked about an inch or so.

It will probably take you at least 12 hours for them to dry enough to grind. They need to be completely dry and crisp in order to be ground. Then grind them in a coffee grinder or food processor, even a blender will work. I use my blender because it is glass and the dry, hard pieces of pepper won't mar the glass like they do in my plastic Cuisinart food processor.

It's the same process with the dehydrator, drying them until they are totally dry and crisp.

Since I took the picture above, I have found some good supplies of decorative bottles and jars, and I also make labels on my computer. They look better and make great gifts this way.

I especially like the sweet-pepper powder. It adds a great pepper flavor to dishes but adds no heat.

Saturday, March 5, 2011

Early Vegetable Gardening

I'm in zone 5, bordering on 6 and warm-weather crops like tomatoes and peppers have to wait until May, sometimes LATE May, to be planted. Our late winters are usually very wet also. But don't let this stop you from planting cool-weather crops nice and early. If I had to wait for the garden to warm up and dry out so that I could run the tiller, I would be waiting a long time.

I went out the other day, March 3rd, and planted two types of lettuce, spinach and Sugar Snap peas. If all goes at least halfway decently with the weather, I should be eating salad by the end of April or the firt week of May. Many people wait until they can run their tillers to start planting, but here is what I do.

Take a grass rake and clear the leaves and sticks from an area you want to plant. Then scrape the ground (it was pure wet muck when I did this) with the rake and loosen up the soil. You don't have to go very deep, I probably only loosened to about 1 inch deep, if that. Then scatter your seeds in a wide row, my rows were about 1 foot wide. While holding the rake straight up and down, LIGHTLY tamp down the area with the flat side of the rake.

I didn't have any dry, loose soil to cover it but tamping the seeds down in that rough soil should suffice. Just for a light mulch, I grabbed handfuls of some grass cuttings that were in a pile from the fall, and lightly covered the seeded area to give it a light mulch.

I have been doing this for some years now and it usually works well. I have even had snow on my spinach before, but it didn't harm it. I am a very competitive person and it's always fun to eat a salad from your garden at the beginning of May, but I make sure to tell my gardening friends that I did so! Yes, I like to rub it in. This is about the same time most people are thinking of buying their seeds, but you will be eating from your garden already.

Here is a picture of what the garden looks like right now. Yes, it is trashed and I have my work cut out for me. But I still was able to plant the other day on the back side of the garden where it is cleared somewhat.


This will be a fun picture to look back on later on this year, after I have everything cleared out and the veggies planted.

Tuesday, March 1, 2011

Homemade Extracts


I was making some homemade breakfast sausage and I decided to add some maple flavoring, which really topped off the flavor nicely. This got me curious as to whether it was easy to make flavorings and extracts or not. I did some research online and saw that it was really simple, it's just that some of them take a long time to 'brew'.

The first extract that I wanted to make was vanilla extract. The hardest and most expensive part of this is buying the beans. Wow! Forget gold, I think I am going to invest in vanilla beans instead. At best you can find them for about $1 per bean online. Locally I was finding them for $2-$3 per bean. I wanted to get a batch going so I sucked it up and bought 12 of them.

I made a slit down each bean the entire length of the bean. Then I put them in a quart jar about 3/4 filled with vodka. You can use rum also, I don't know that it makes much of a difference though (??) I don't drink any more, so this was the funny part of it all; sneaking into a liquor store hoping no one would see me! Ha! Then I put the jar into a place in my house that is away from extremes of heat and cold, and out of the sun. I shake it maybe once every day or two, but make sure you shake it at least once every week.

The recipes I saw online called for an aging period of anywhere from 6 weeks to 6 months, and every one I saw had a different ratio of beans to vodka. I think that 3 months will suffice, and right now am at the 2-month mark. It's getting darker and getting a stronger vanilla aroma to it. If the darned beans weren't so expensive I would add a lot more beans to it, but again they aren't cheap. I have read that once you make a batch of vanilla extract, you can cover the same beans with vodka and make it again. I will see if this is true or not after I finish aging this batch.

Some of the extracts that don't take nearly as long and that I've completed now are lemon extract, orange extract and maple flavoring.
For orange and lemon extracts use one orange for every half-cup of vodka. You can slice the rind off, being careful not to cut any of the white pith, then finely chop it by hand or in a food processor. Or, as I did, rub the orange over a fine grater like this one that I have:


Then add the grated rind to the vodka/rum. After a week, filter the extract through a coffee filter or a piece of muslin and it's done. When my vanilla extract is done, this is all that I will have to do to it also.

I found this idea online about making maple flavoring and it is also easy. It's not a true extract, it is a flavoring, and to get the maple flavor you don't use a maple product at all. It surprisingly comes from something called fenugreek seed, which I got through Amazon.com, about $4 for 7 ounces of it.

For every 4 ounces of vodka, you will use 2 ounces of fenugreek. First warm the fenugreek seeds slightly in a skillet, but don't toast them as you would when toasting nuts. The fenugreek will become bitter if you heat it too much. You just want to warm them to release the flavor.

Next grind the fenugreek in a coffee grinder, food processor or something similar, into a fine powder. Pour the ground fenugreek and vodka into a glass jar, I used a quart canning jar. Store it out of direct sunlight for anywhere from a few weeks to 3 months. I found that it had a good smell to it after 6 weeks. Next strain the contents of the jar through a coffee filter or a piece of muslin.

I tried making almond extract but after a couple months it did not have much of a nut smell to it. I might try it again, but age it at least 3 months and see how that goes.

The bottles that I put the extracts in were hard to find without spending a lot of money, But finally I found these 1 oz. amber bottles for only .59 cents a piece at my favorite store of all time, Lehman's Hardware in Kidron Ohio.


However, I was not able to locate them on their website, and bought some on a recent visit there. Other places that carry some small bottles that would work are Joanne's Fabric, Hobby Lobby, and World Market had a few.

So I am just waiting on the vanilla extract, it should take another month. I have already given some of the orange and lemon extracts away to friends. One of them baked with the orange extract and gave it a big thumbs-up.

Saturday, January 29, 2011

Homemade Mozzarella Cheese

Yes, I've been delinquent in posting new things. I've been busy with my recent marriage and all that comes with that, and it is hard to keep up with posting new articles.

HOWEVER....I learned something new, and it is really exciting. I learned how to make mozzarella cheese. There is a quick way, and a longer but better way. For now I will tell you about the quick way, since I have not ventured into the longer method.

There are a few things you will need that are usually not easily found in local stores.


One is rennet, this is what forms milk into curds. Another thing is Citric Acid. You can find this sometimes in the canning section of many stores; it is used also in canning tomatoes to keep their color and flavor.


The site that I buy my cheesemaking supplies is http://www.cheesemaking.com/ Ricki Carroll is an old hand at this, and has a good inventory of cheesemaking supplies. None of these ingredients are expensive.

Pour a gallon of whole milk into a large pot, from what I have read skim milk is NOT good for mozzarella. Add 1/2 teaspoon of Calcium Chloride (CaCl) into a quarter to a half cup of water, and mix THOROUGHLY. Then mix the water/CaCl solution into the pot. I was advised to use non-chlorinated water for mixing the ingredients, so I keep a gallon of bottled water handy just for cheese making. You can also let tap water sit for 24 hours to dechlorinate it. I don't really know at this point whether non-chlorinated water is that important or not. Since I am fairly new to this, I do what I am told.

Turn the heat to a low setting. My electric stove goes from 1 to 9 and I warm the milk at about 2 to 2.2. I could probably go higher but I'm a rookie and I'm scared!.


When the milk reaches 55 degrees F, add 1.5 teaspoons of Citric Acid, again mixing it into a quarter cup or so of water before adding to the milk. Stir it gently but well, and continue slowly heating.

It will start to look like Ricotta cheese.


When the milk reaches 88 degrees F, it's time to add 1/4 teaspoon of liquid rennet. Again, it is mixed with 1/4 cup water before adding.


Stir the milk with an up and down motion for one minute after adding the rennet. Continue heating the milk until it reaches 100 to 105 degrees. After adding the rennet you want to avoid bumping or moving the pot. Disturbing the pot can prevent a good curd from forming.


Turn off the heat but let it sit for about 20 minutes. The curd should start to separate from the side of the pot.


Using a large spoon (I found my pasta spoon worked wll) scoop out the curd from the pot and place into a large microwaveable bowl. I've heard the leftover whey (the liquid remaining) is great feed for chickens, hogs, etc, but I don't have any critters like that.

Press the curd down with your hand to remove excess liquid. Now place the bowl in your microwave oven on high for one minute. My microwave is fairly strong so you might want to add a little time to yours, depending on your microwave.


Since the cheese gets fairly hot, I put heavy duty kitchen gloves on at this point, and press the cheese with my hand to drain even more liquid from it. Wash your gloves before using, just like you do with your hands!


Drain off all of the excess whey that you can. Fold the cheese over and over in your hand to distribute the heat throughout the cheese.

Microwave 2 more times for 35 seconds each time. Each time you heat it knead the cheese again to distribute the heat. Knead it quickly until it is smooth and elastic like taffy.


When it feels like taffy, it is done! If the cheese breaks instead of stretching the cheese is too cold and needs reheated.

Mozzarella is best eaten fresh; roll it into small balls for fresh eating. However, it's not always practical to eat it right away. If you are making it for eating at a later time, you can form it into a loaf, a ball, or once I made 3 ropes out of the cheese and braided it (it looks really cool that way.) Then you want to place the cheese into a bowl of ice water for about a half hour to cool it rapidly. Now you can store it covered in the refrigerator.

Here's a idea I came up with, and it REALLY tastes good. When the finished cheese is still warm, shiny, smooth and like taffy, roll it out onto your counter with a rolling pin. Roll it into a rectangular shape about 12-16 inches long and 8-10 inches wide.


Now place just about anything you would like on it. In this batch I used fresh basil that I broke up into small pieces, and chopped black olives. A good prosciutto would be nice, I am going to try that sometime.


Now roll it up like a jelly roll


Place the cheese in plastic, wax paper or in a closed container until it cools and stiffens somewhat. Then slice across the roll to make small slices about a half inch thick, and eat.


Tonight I went to a dinner party where I made bruschetta and it turned out GREAT! I used this recipe for the bread. I cut the bread into about 1/2 inch slices. Then I made a batch of mozzarella and formed it into a loaf/roll about 2 inches in diameter.

When the cheese cooled I cut slices that were about 1/4 inch thick. I baked the plain bread for just a few minutes in a 350 degree oven (not broiler) to make it more crisp, then placed 2 slices of the mozzarella on each slice of the bread. I topped all that with a mixture of finely chopped tomatoes, smashed and chopped garlic, chopped fresh basil, grated Parmesan cheese and a quick splash of olive oil and balsamic vinegar. I then baked it for a couple more minutes until the cheese was starting to melt and the edges of the bread just started to brown a little bit. Be sure to watch the bruschetta in the oven closely while it is baking. It doesn't take long and it would be easy to set off smoke detectors instead of eating a good bruschetta.

It was SO good, it disappeared quickly! I will have to make another batch for us to eat at home.

Mmmm....lotsa mozza!

Wednesday, October 27, 2010

'Got Myself Hitched'


I just wanted to post something real quick concerning my lack of posts this summer. I got married on October 16th and the summer has been a blur. I have done a lot of things that are worthy of posting articles about, but just haven't had much time. Now that I have my new lovely wife moved in, hopefully I can post some new articles soon. However, my wife Sue has quite a Honey-Do list made up for me and it doesn't look like things will let up much very soon!

I have one article that is almost completed and I think you will like it. It explains how to make homemade mozzarella cheese. It is SO good, fun to make, and takes maybe an hour, or less. Also, I have smoked some of the cheese in my cold-smoker for smoked mozzarella and it is to DIE FOR.

So hang in there, I hope to post that and more very soon.

If you are interested, I posted some wedding/honeymoon pics on my picasaweb space, HERE .

~ Marty